Friday 24 July 2015

Flexi-Clear Stamping by Little Stamp Store

My exciting new product, "Flexi-Clear" enabling you to control the pressure on every point of the stamp because the mount is flexible. The see-through clear-mount allows you to place the stamp exactly where you want the image to be. Available to order now! *******I SHIP MY STAMPS WORLDWIDE******* Flexi-Clear is so thin that it fits into a large envelope for postage. 


Remember if I've gone quiet on the blog, I'm always posting and listing elsewhere. 
Etsy.com/shop/littlestampstore
Facebook.com/littlestampstore

Friday 11 April 2014

Earth Friendly Cute Rabbit Pin Cushion


Printed scraps of material, now designer pieces to play with 

Earth Friendly?...  By that I mean we used our own homemade stuffing with stuff we'd normally throw in the bin.  We didn't pay someone to design and sell their own fabric have it shipped to shops for us to go and buy.  We made our own fabric design and printed it onto a scrap of material that we had at home.  

We used a very simple stamp design, by cutting a circle in half and reversing the circle to create this effect.  It was very simple to carve but so effective and pretty on the eye.  For the top scrap of material I re-created an image of a rabbit sketch by carving very carefully with Blade 1 from ABIG. 

http://www.abig.de/index.php?id=5&L=3

Here is a picture of the repeat-printing geometric stamp.

Using two fabric colours with Versa Craft Ink pads you just turn the stamp
each time you print.  You can really relax when you do this as the print is so effective a
5 year old would have so much fun with this.

 http://www.tsukineko.com/where.php

I was really pleased to see the end result of the stamping.  Luckily with my stamps
they always stamp first time, so there is no wastage unlike LASER stamps Booo...  I would always
recommend handmade for material printing.
That's not to say laser printing has its own qualities too, which I can't wait
to share with you in a later blog.
To avoid waste the material was measured to fit the stamp.

The bunny print came out really well, I was very pleased.
You need to iron the ink to heat set it. 

Time to sew -- this is my Nan's sewing machine, which kinda ended up staying with me... for years! :)

I sewed the mini bobble trim first before I sewed the underside on;
this way I had the sewing line to follow on the outside.

Turn it outside in the right way. 


Now it's ready to stuff with tumble dryer fuzz!!!  Yep that's right, no cost on stuffing,
it doesn't blunt your needles like normal cotton stuffing and it's free.,
but it did take a long time to patiently wait for enough ;)
But it's well worth the wait for Free dense stuffing.
Finished Pin Cushion

Woodland Stamp Set for Showcase Handmade UK


I had so much fun taking part in the last showcase, I couldn't wait to do another, but as it goes I had to skip a few because of how busy i've been in the Little Stamp Store with custom orders. https://www.facebook.com/showcasehandmadeuk 


The theme this time was a woodland theme, so I chose to do a box set of stamps that had a deer, squirrel, tree, mushroom and an acorn.


Using the acorn stamp I created a gorgeous repeat pattern

I designed all of the images, I am especially happy with my
Oak leaf tree.
 I used my carving blade from ABIG and as usual it didn't let me down. Blade 1. http://www.abig.de/index.php?id=5&L=3


Thursday 10 April 2014

Easter Fairisle Egg ****GIVEAWAY****

I designed a fairisle inspired Easter Egg with bunny rabbits and trees in it with a glorious sun.  I wanted to incorporate my love of chevrons in the design too and I think it works. 

I have the Demo Egg used for photo shoots and would like it to go to a good home, also thought I'd try to get a little reach out of it ;) as any self respecting blogger would!

I really hope you like it and join in with the fun. Here is the link for you to share...

https://www.facebook.com/LittleStampStore/photos/a.843515132330054.1073741855.489126394435598/843515138996720/?type=1&theater 


I have achieved the gradient colours with separate ink pads not one multiple one. 

Bunny Egg Heads :) Lots of fun at Easter time...

Check out these guys...  I've been busy with my boys making all of their cousins and friends gift bags and tags.  They had so much fun making these and using lots of colours to create lots of different Bunny Egg Heads.  I wish I'd have thought about their design sooner, in time for Easter sales.  Still there's next year...


There are 3 stamps to the set.  2 bunny ears and one egg with a fresh geometric design to them.  All sets are sold with an ink and 20 google eyes.  The stamps are also kept in their very own little bag to keep it safe from abrasions. 
My boys are pro's at stamping, they get the placement spot on
and press just the right amount.  George is 4 and Elliott is 6.


Next step was to glue the google eyes on, which they did superbly :)  


Elliott reaping the rewards of all his hard work and enjoying sampling the chocolate going into the bags :)


Tying the tag on the bag, I bought the tags from Amazon.co.uk and the bags from Colemans a local craft shop to me. 


Look at all of those adorable little faces :)

Just incase you'd like to purchase a fab set?  I can get them to you in time to play in time for this Easter...  Sadly I'm not sure if this will be possible if you live outside the UK.  But we could give it our best shot!

Chevron design

Criss Cross design

Sunday 27 October 2013

Giveaway Winner - Louise Holgate Photography


I was so pleased that Louise Holgate won the giveaway prize of a custom stamp of her choice.  When I saw the picture of what I had to carve, I melted at how cute and stunning it was.  I knew it was going to look good as a print and it so does.

It took a little time to carve as it was pretty fiddly to get around all the branches, etc. but was well worth it.


Here's her facebook page to check out...
https://www.facebook.com/LouiseHolgatePhotography


Before the stamps get sent out, I always check them to make sure they stamp correctly.  A good stamp should stamp first time every time.  Some times in workshops people will say, "I've still not learned how to stamp without getting the lines around the edges", etc.  It's not you! it's the stamp.  You can be a complete novice with my stamps and do it first time.

The finished carved stamp.
 
This stamp was mounted onto a clear acrylic block.  This way you can stamp directly onto the first image and see where your placing it for accuracy of print.


Here are some photos of what was included in the giveaway, a two system stamping set, two inks and two bags to keep the stamps safe from abrasions.


Two stamps: the background to the tree and the tree.  Louise was given two Versa inks to go with her prize.  Versa inks are so highly pigmented; just wish you could get pads in A4 size.

Printing is great so it's ready for a quick clean and package to be posted out.

Here's the baggies that every stamp I make gets sent out in.


I'm really looking forward to finding out who I get in the next giveaway...  Thank you to all who took part in the giveaway and sharing and liking my facebook page.  All my income comes from my page and you're all so very important to me.  I hope to be making your stamps for your replacement stamps and more, well into the future.

Thanks so much, Fran Sherbourne x


Here are a few pictures that Louise sent back to me to share with us what she's up to with her stamps :)  My favorite bit when I get to share what your doing with your stamps.


Wednesday 16 October 2013

Fran Sherbourne - Rubber Stamp Carving Workshop

The Workshop

It was a lovely little group of ladies today who came to the workshop to learn how to carve rubber stamps.

I drew up a few easy to carve shapes and printed off a few for the ladies to trace and carve.  All of the designs went down really well and some found them great to choose from.  So I'll definitely be using this lesson again.  Here are the sample pictures that I drew and took with me to share, they were all drawn with the idea that repeat printing would be used.  You will see a lot of gift wrap out there with stars used in repeat printing styles.


I started off by doodling with pencil, then when I was happy I made the patterns bold and easy to trace.
Here's some of the ladies work from the workshop today.  Not bad at all for their first attempts at carving.  Just a few practices at a couple of simple techniques and they were off.  I even had someone eager to try the reindeer, and succeeded really well for a first time :)
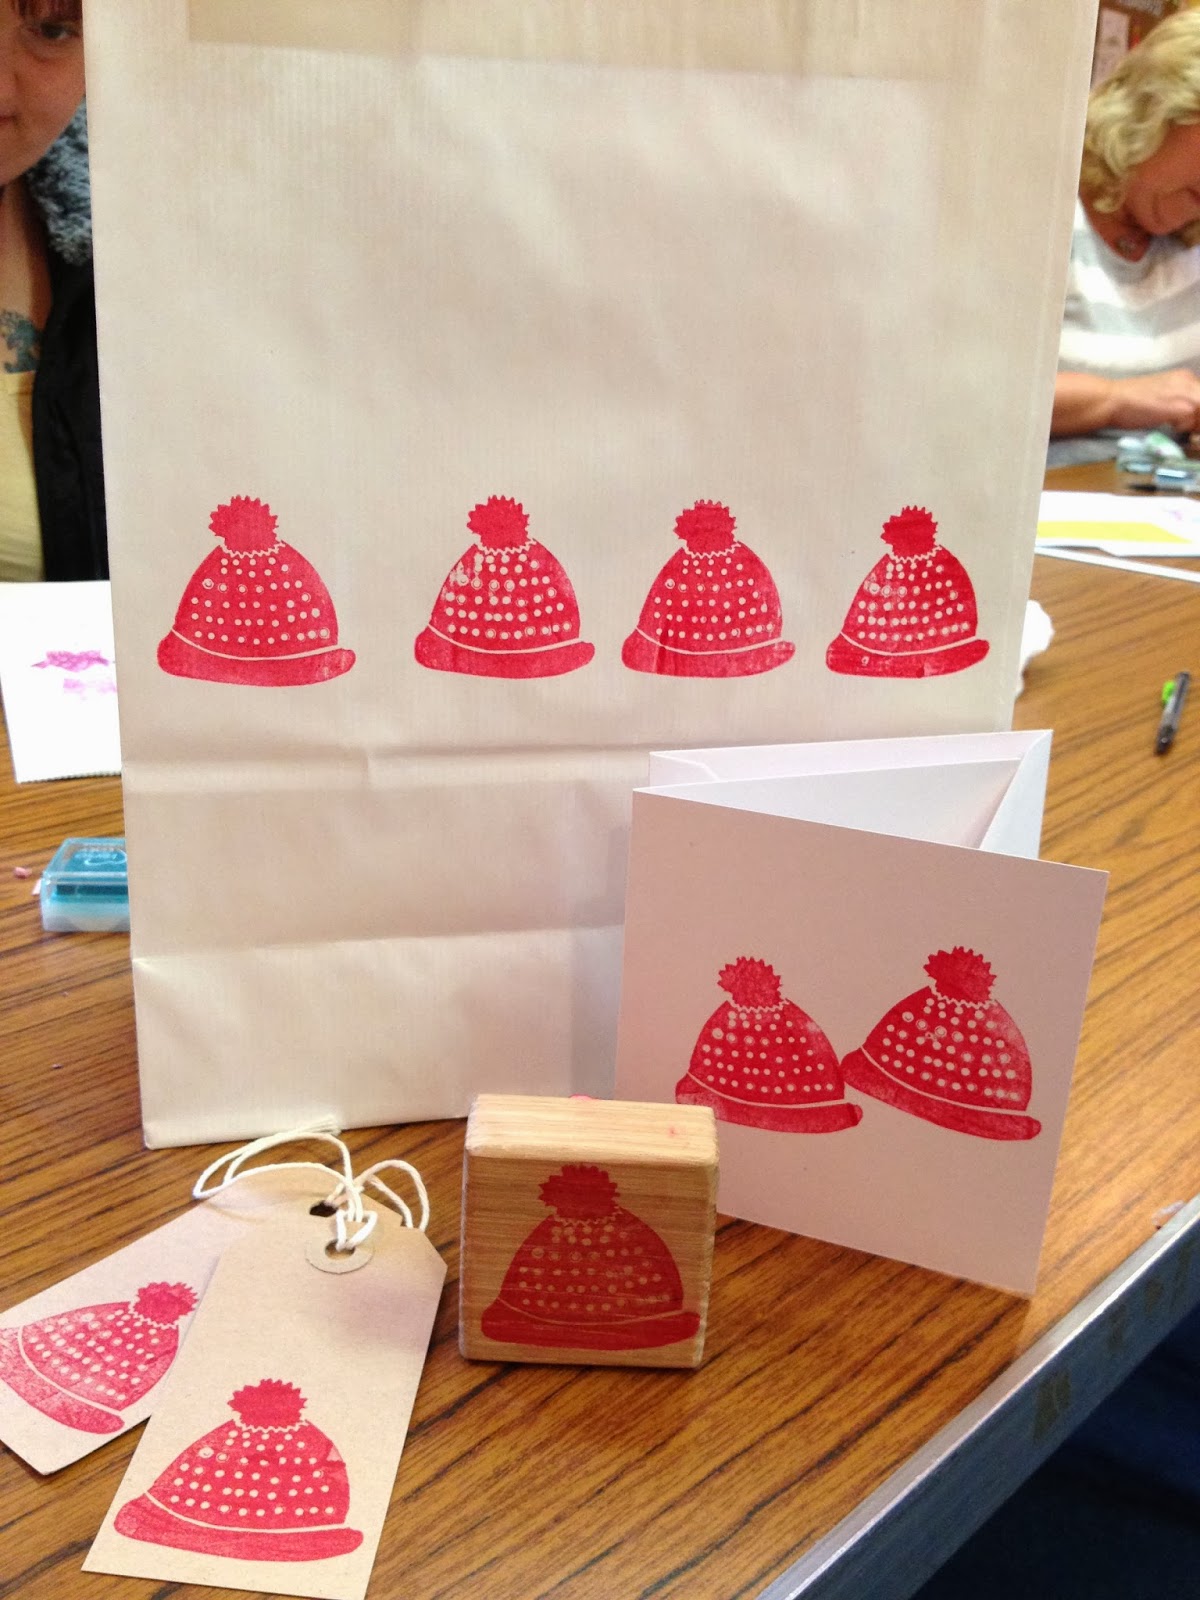
A simple bobble hat design, so easy to carve for a first time carve 'when you know how'

Workshop Ladies get to take their stamp home, mounted on kiln dried oak

Using the simple rounded abstract triangle to create a colourful forest of multi coloured trees.

Another simple carve to do 'when you know how'. Using cutting tools found lying around the house.


A Christmas Bauble, again using tools, utensils around the house to make these simple patterns.

And a budding future stamper I think, not bad at all for a first attempt.
So there we have it another workshop complete and it went really well.  I absolutely love teaching people how to carve, it's so relaxing and I can't wait to do more.